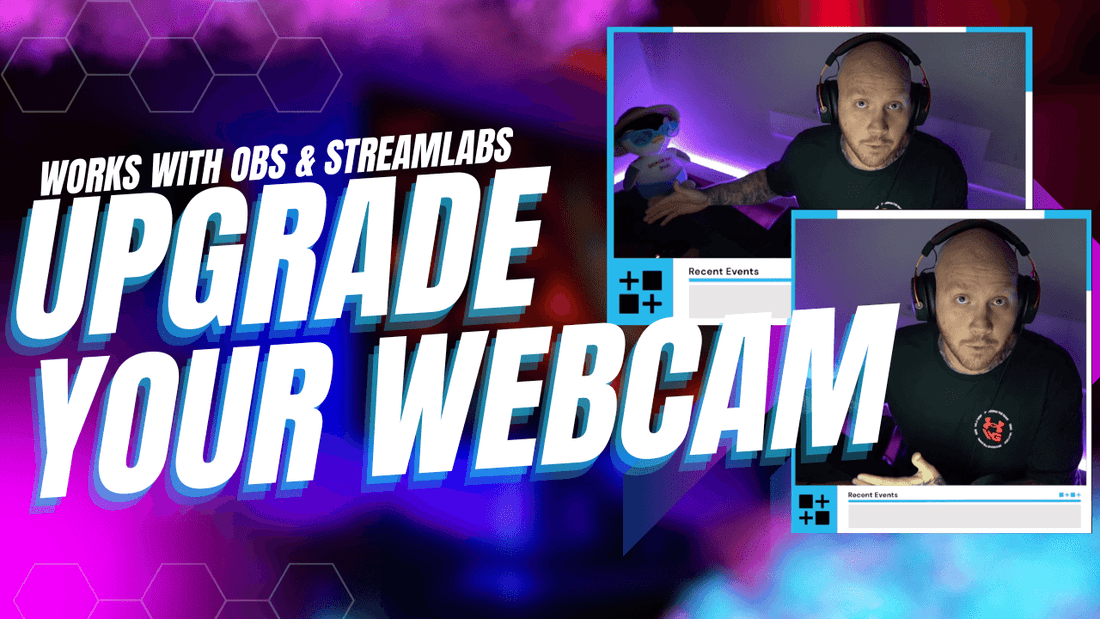
How To Create a Vertical Webcam Border with a Landscape Webcam Overlay
Most people don't know that you can take a webcam from a regular landscape webcam in OBS or Streamlabs and turn it into something called a "vertical webcam" without changing your overlay border. This will add TONS of variation to your stream. In this article, we will list out a few tips and tricks to wow your Twitch, YouTube or Facebook audience!
Changing your webcam look and feel can be done in as little as five steps in order to turn your webcam from landscape into a vertical webcam for your next stream. Make sure to check out the video below for a quick guide and leave us a comment below and a like the video if you thought this was helpful!
Step 1 - Creating the Camera Scene
So the first thing we're gonna do is go over to OBS or Streamlabs [this works with both]. The first thing you want to do is create a brand new scene and call it "4:5 Camera" or name it something like "Vertical Camera".
Then, simply add in your Video Capture Device under the Sources list. Next, we are going to add in your Webcam Border. This may be a image or video source similar to the webcam borders we sell here on iLeveled!
TIP: the reason we are creating a new scene instead of just making a group is to introduce the concept of "Scene Nesting". This is an advanced function available in OBS and Streamlabs that can really upgrade your stream! More on this shortly.

Step 2: Using Hotkeys to Adjust Your Sources
To make a vertical camera source we are going to need to learn 2 different OBS & Streamlabs hotkeys that are going to be lifesavers:
Alt + Left Click [ Allows you to crop and source ]
Shift + Left Click [ Allows you to stretch any source ]
Using these hotkeys will allow us to "cut"and "stretch" pieces of your landscape webcam source and make it into something more vertical or square. These hotkeys can be used in a WIDE range of sources within your favorite streaming software so think outside of the box and try out a few variations! In the video and for this article, we are going to be using the Leveled Up Pack webcam borders as an example.

Step 3 & 4: Duplicate and Stack Your Webcam Border
Now that you have your Webcam sized correctly, it's time to resize and get your webcam overlay to match your webcam source. The first thing to do is create 2 copies of your Webcam border. One for the bottom of the webcam and one as your border outline.
SPECIAL NOTE: Make sure the webcam border overlay is "looping" by going to Properties --> Loop if the overlay is an MP4 or WEBM file.
First, take the "bottom" webcam border source and use Alt+Left Click to cut and resize the bottom of the webcam border. NOTE: Some webcam borders only come with and outline but this method will work with any webcam border source.

Next, take the duplicate source and place it on top of your Webcam source and do the opposite: use Alt + Left Click to cut off the bottom portion then resize it so it fits the top of the Webcam source.
TIP: Make sure to not sure Shift + Left Click just yet. Just resize the top potion of the Webcam Border Overlay until it fits the best it can on top of your Webcam Source.

Step 5: Use Shift + Left Click to Stretch you Webcam Overlay
Now this still doesn't fit perfectly, so how do we fix this?
Once we cut off that bottom piece, you can use Shift + Left Click to drag the top border overlay until it fits perfectly over the webcam and connects to the bottom. You may need to shift the edges as well to make sure it fits perfectly over your webcam.

Scene Nest Your New Vertical Webcam and You're Set!
Now that we have a Vertical Webcam all that is left is to "scene nest" this into our gameplay scenes. Basically, OBS will turn this new "4:5 Camera" scene into a Source. You can easily add it to your Gameplay or Intermission scene by going to your desired scene and adding it as a Source. Here are the steps below:
Desired Scene --> Add Source --> Select "Scene" --> Select The Vertical Camera Scene Name
Some streamers may be used to grouping their webcam sources but by having this webcam as a scene, this allows you to easily make changes to your webcam and have it be applied across multiple scenes instantly by making a change in only 1 spot. This also pairs well with OBS plugins such as Move Transition or filters such as Color Correction.
TIP: Get creative and try applying Filters to the new Vertical Webcam scene instead of the source 👍
Leave a comment below or reach out to us and we would be happy to help!


